REDCap is a web-based platform that allows for the digital capture and storage of participant consent, whether participants are consented in clinic or remotely. Being able to manage consents virtually enables flexibility and a critical step to expedite the clinical research process.
New to REDCap? There are a number of resources available which can help familiarize you with the platform.
The REDCap eConsent Framework provides standardized tools to obtain consent and store consent documentation with a certification screen and a storage function which automatically generates a ‘hard-copy’ PDF of the signed form.
What is required to set up an eConsent in REDCap?
Consenting Text (i.e., what would appear in the paper consent document)
eConsent Framework (please check with your REDCap administrator if the eConsent framework does not appear in survey settings)
How to set up eConsent in REDCap:
1
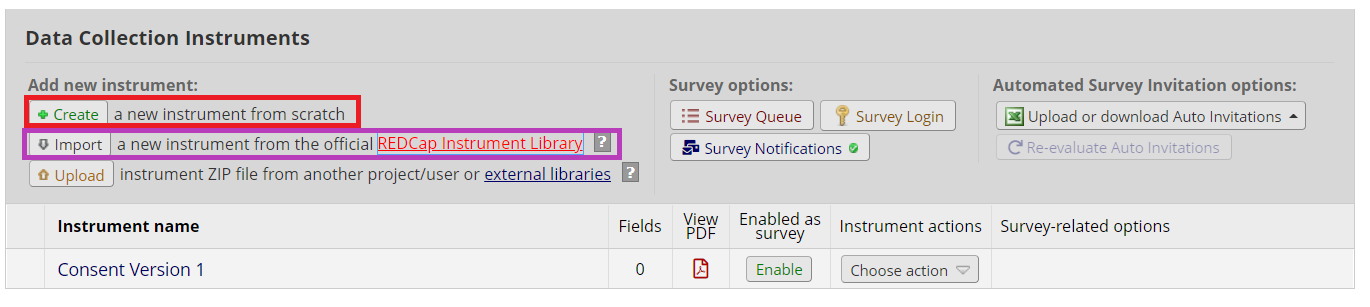
Create a new instrument – this will be used as your eConsent.
**If you have both a Part 1 and Part 2 consent, you will need to create two instruments.
**If you would like to use a template, you will find a standard eConsent template at the bottom of the eConsent resources page. Upload this instrument by clicking “upload instrument” on the online designer.
You may either create an instrument from scratch or import a consent tempolate from the REDCap Instrument Library (Hint: search "consent")
2
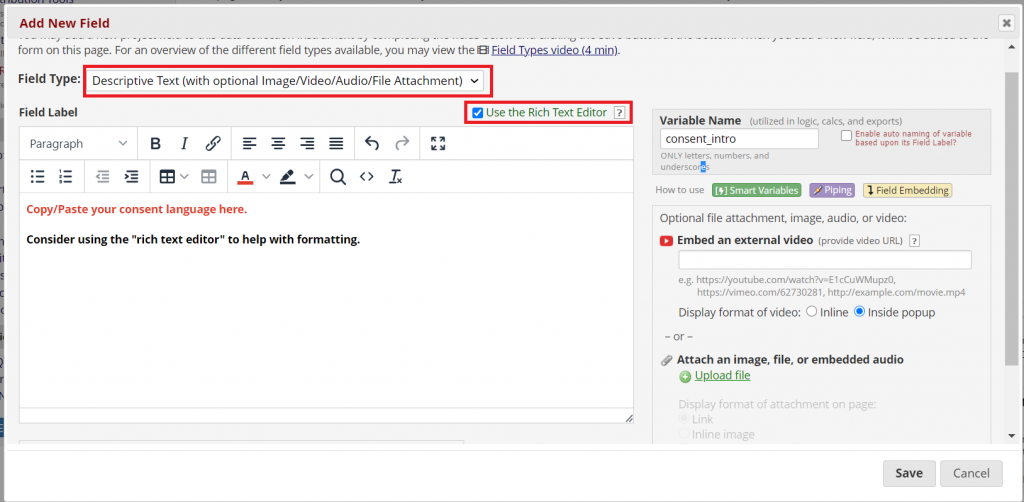
Copy your consent language into the new instrument. How many fields you use is up to you, but here are a couple of things to keep in mind:
**For especially long consents, consider using page breaks to divide up content.
**Divide sections by topic (e.g., risks, benefits, contact information). This can help to visually divide the text.
You may copy /paste text from the PDF or word document version of the consent. Consider using the rich text editor to help with formatting. Break long pieces of text into multiple fields.
3
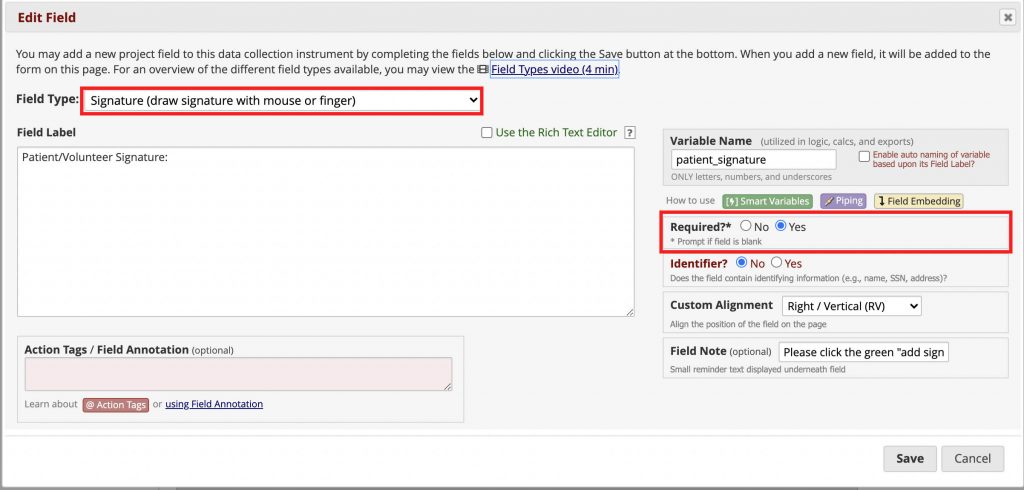
Add the signature under the consent statement and a date validated field.
Choose "signature" from the field type and ensure field is required.
4
Enable surveys on the “Project Setup” page.
5
Enable the consent instrument as a survey.
6
Within survey settings, scroll down to “eConsent framework”. Enable the “auto-archiver + eConsent Framework”. Once enabled, this section will expand with additional settings:
**You may include several items which will be included at the bottom of the exported PDF, including first/last name, eConsent type (e.g., pediatric). “Type” is typically used when a project contains multiple eConsent forms.
**You may also include the version number of the consent. This, along with consent tpe and participant name will appear at the bottom of the final PDF consent.
**The version of a consent form is determined by the number of revisions to the document. The first version of a consent might simply be “1” with any subsequent revisions of the consent (and thereby a new version) being “2” (and so on).
**The final section of the eConsent framework involves clearing signature fields should a participant return to the eConsent after viewing the confirmation page. After submitting an eConsent, the participant is asked to review a PDF copy of the consent and confirm that their information is correct. If the participant sees an error and returns to the document to correct or update information, they will need to re-sign. This ensures they sign the most up to date version of the document. This section is only required for studies needing Part 11 compliance, however, it may be useful for any study.
7
Finish up by clicking the “Save Changes” button.
Play Video
8
Test the entire eConsent workflow to ensure everything is working as expected. Once you are ready to begin using your eConsent, move your project into production.
*Note: consider making a copy of the project which can be used for practice/training.
Play Video
How do participants use eConsent?
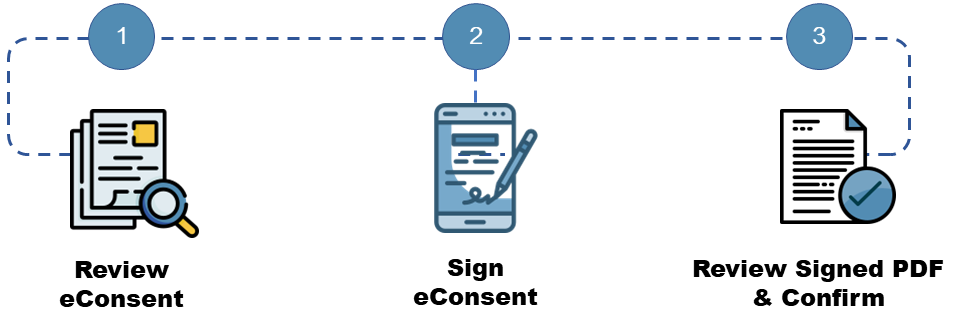
The potential participant will first read through the consent on a tablet, computer or mobile device. If they choose to participate in the study, they will sign their name using the “signature” field and complete any other required information.
They will then select “Next Page” and view a read-only copy of the consent. This extra certification step allows the participant to confirm that all their information in the document is correct and review the consent prior to submitting. To submit, they will check the statement which reads “I certify that all my information in the document above is correct, and I understand that signing this form electronically is the equivalent of signing a physical document.” Once this is selected, they will submit the eConsent.
The eConsent will not be considered complete until the certification step is complete.
Where are the completed PDFs stored?
Upon completing an eConsent survey, a read-only copy is stored both in the file repository and in a secure vault. The PDF consent will include the information (i.e., name, date of birth, consent version)from the eConsent Framework options at the bottom of each page in the PDF.
The IP address of the individual completing the survey is recorded and this information is displayed in the file repository.
To view/download completed PDFs:
1. On the left hand side menu, click “File Repository”. This sits under the Applications header.
2. Click the PDF Survey Archive tab
3. You may then search for specific consents and download PDF copies.
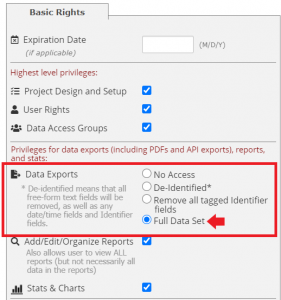
**Note: only those with access to the ‘full data set’ under user rights will be able to download documents from the file repository.
You may find this under "user rights"
To learn more about File Repository, watch the video below:
How do I submit to the IRB?
IRBs will have varying requirements for submitting your eConsent. However, in general, we recommend:
– Reach out to the IRB early in the process to see what is required to submit/approve an eConsent
– Submitting both a PDF copy of your eConsent and the public survey link, to allow the IRB to view the consent as a participant.
– For any external modules, include any additional text in a separate document. Submit any embedded videos along with a transcript.
Additional Considerations
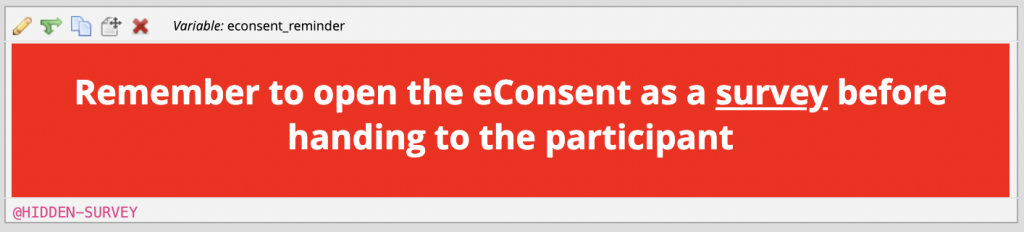
eConsents must be opened as a survey before the participant signs and submits. It may be helpful to place a reminder at the top of the instruments to prompt study staff. This reminder is not visible to participants if using the action tag “@HIDDEN-SURVEY”
For a warning like the image above, copy the code below into the “descriptive text” REDCap Field:
<div style=”background-color:red; padding:20px;”><h1 style=”text-align:center; font-size:200%; line-height: 35px; color:white;”><b>Remember to open the eConsent as a <u>survey</u> before handing to the participant</b></h1></div>


")

")
")